Many of you have asked me about Dannica’s play kitchen in the past few months. Honestly, if you’ve ever wanted to start on a small and simple DIY project, this is the perfect one for any DIY beginners to dip their toes in! It really is fool proof and the result is so worth the extra hour or two in constructing it.
The base of the kitchen is IKEA’s Duktig play kitchen which you can purchase online or at their shop. The kitchen built as is looks like the photo below:

The first step is to lay out all the parts and spray paint all the wooden parts (front and back) white. You can purchase affordable white matte spray paints at your local Home Depot. Make sure that they are completely dry before you flip them over and paint the other side. **If you love the look of a farmer’s sink, then you can purchase a can of glossy white and spray paint the sink.** The second step is to spray paint all the fixtures rose gold (my choice of color was rose gold, but you can choose bronze, copper, anything that suits your fancy!). Don’t forget to spray paint the small tiny hooks as well as the faucet and burner rims. If you keep the plastic covering of the burners on, then you can quickly spray paint the rims without taping anything.

While everything is drying, you can start on the faux marble countertop. I bought mine from Amazon and was so happy with how it looked and turned out. You can cut out the portion where the sink and burners go in and all the other nail holes, I simply nailed through the contact paper and that worked out perfectly well. The final touch is to add the stove and oven knobs to the front. I bought the knobs from Amazon and simply Krazy glued them on after marking a placeholder with a pencil.

I’ve seen so many people do fun back splashes (I am trying to do a subway tile back splash and still on the hunt for the perfect tiles) and paint the insides of the cubby holes as well. If you search IKEA Duktig makeovers on Pinterest, there are hundreds of different hacks that people have done. I personally settled on this one because it was my dream kitchen colors and aesthetics growing up!

It really only took around 1-2 extra hours on top of the time it takes to actually assemble the kitchen. I hope this inspires you to do one as well! You can see below for sources and of course, please feel free to ask me any questions below!
Ikea Duktig Kitchen // Faux Marble Contact Paper // Apron // Kitchen Appliances // Potted Plants // Stove Top Knobs
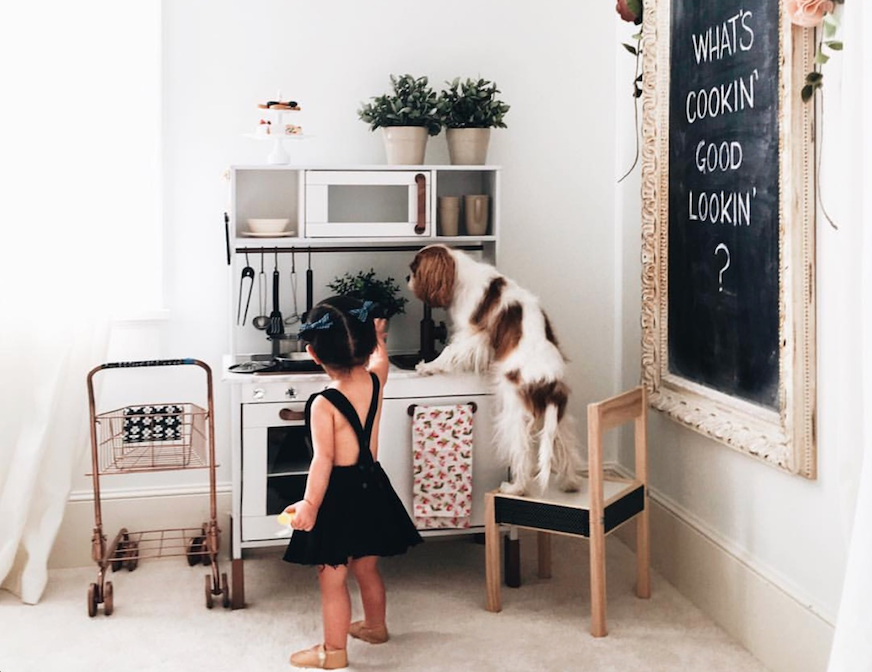
Washcloth is from Joann’s fabric, all other accessories are from Target, and misshapen cupcakes were baked by yours truly.


Giann
I love this! As a fellow King Charles Cavalier owner, your Instagram and blog is one of my absolute favorites!!!
aenny04
Aren’t they simply the best breed? I have never met a CKC nor a CKC owner that I didn’t like! They’re just so sweet and gentle. Thank you so much for your support. It means SO much to us!!!
Janice
Stunning!!!! Absolutely genius and beautiful! You know how much I loved playing with all of Dannica’s play-things! All those miniaturized fruits, bread, veggies, and desserts! I wish I could visit every weekend!!!
aenny04
AWWWWE well we LOVED having you!! D now yells out MOMO whenever she sees photos of you on my phone!!