
This room has by far been the MOST FUN and definitely my favorite room to conceptualize and plan. I’m a little sad because in a few short months, I plan on redecorating Dannica’s playroom into her “big girl” bedroom (since baby brother will be taking over her current nursery). I put so much love and attention into this room, and we made so many wonderful memories here, that it is a bit bittersweet to let it go. This post is in one part to “scrapbook” Dannica’s very first playroom, and in second part to *finally* field all the questions that so many of you have asked me in the past few months with regards to seeing photos of her playroom, tips on keeping it clean, and where I sourced all the furnishings and decorative accents.

Here are five things that I thought were helpful to keep in mind when conceptualizing a fun and functional playroom that you AND your kids will love!
1. As you would for a nursery, build off a theme when designing a playroom. Whether it be based off colors, textures, or something more activity based like camping. It will give the room a more cohesive and “cleaner” look.

2. Keep everything in the background BRIGHT! That means all textiles (rugs, throw pillows, etc), lighting, drapes, wall color, and large furniture. It will make the room appear larger, brighter, cleaner, and easier to redecorate when you want to switch things up. I also think that kids play better in a bright and airy room.

3. Don’t put everything out. Rotate toys and books. This is a win-win for all. Your kiddos will love the fresh rotation of toys once they’re brought out and the room will look tidier and will be easier to clean up!


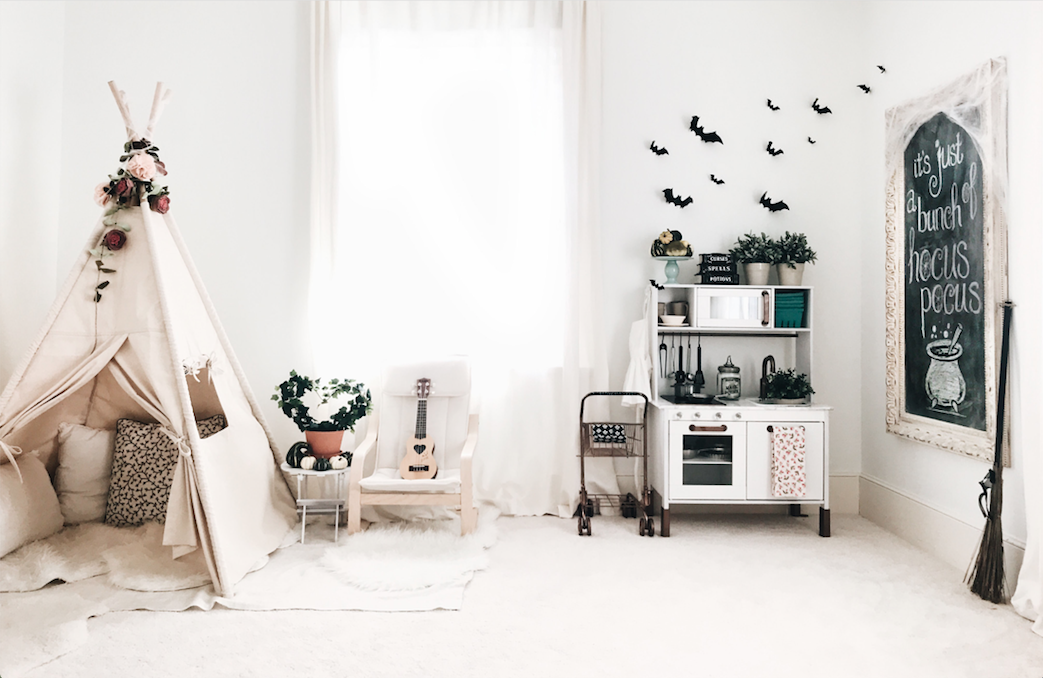
4. Mix high and low priced pieces to achieve a beautiful playroom without breaking the bank. Purchase affordable items that will get a lot of wear and tear, and then thread in nicer accent pieces to bring your room to life. Dannica’s play table, kitchenette, seating and all textiles are from IKEA. All textiles are machine washable and were less than 15 dollars!


5. Last but not least, DIY and make it your own. It doesn’t have to be an elaborate week long project. It can be a simple and creative use of a can of spray paint or a roll of washi tape. Some simple things I did was to spray paint Dannica’s shopping cart rose gold (it was originally hot pink) and replace the seat’s fabric. I also used washi tape on her play table and chairs where I knew would get dirty easily. So now, not only does it look more unique, it is much easier to wipe off markers and food stains off the tape than it would have been with the original wood. I also used washi tape to create the silhouette of a home and chimney. I love how it turned out and it was a simple by product of me being too scared to put up wallpaper and too cheap to purchase wall decals (aren’t they just large stickers??). A bigger DIY project that I did and would highly recommend is her IKEA play kitchen. I posted a step by step account on that DIY here in a previous post.


A ton of you have asked for a walking tour of her playroom, so I have included here a little video of her playroom with all of our Halloween decorations!


Nicole
Thank you so much for sharing! Love this post! I hope you can do a post soon on editing! Your photos are so amazing!
aenny04
Thank you so much! And I definitely will. It is just slightly daunting to tackle it on and I’m trying to figure out a nice and organized way to present it 🙂 it’s been in the works forever—!!
Abbey Gleason
We are just starting on my daughter’s playroom- your post is giving me some serious inspiration! Love it! One question- are the bats from Michaels? Are they paper? How did you hang them?
aenny04
Ah!!! The bats are the only decorations I did not get from Michaels. I actually purchased them from amazon 🙂 if you search for “3D decorative bats wall decal”, you will find a whole slew of them 🙂 I got mine for 7.99 for 28 of them! You just stick them on the wall. Super duper easy! Hope that helps and have so much decorating you’re babe’s playroom!! <3
Karis Narofsky
Where is that precious little guitar from?
aenny04
Hi there!! I actually got it on Amazon 🙂 if you search for ukelele there will be hundreds of adorable options with all sorts of different colors for under 30 dollars! Hope this helps 🙂